Background
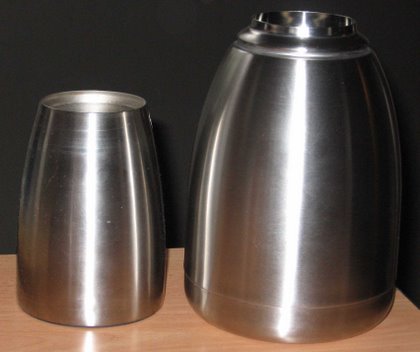
I recently enjoyed some playtime with low power halogens and a vacuum mug. Follow the link if interested in that backstory. The mug is on the left in this picture; the 1.5 L vacuum carafe I'll be using in this project (a cheap unit I bought and immediately broke the top off) is on the right.
Moving right along . . .
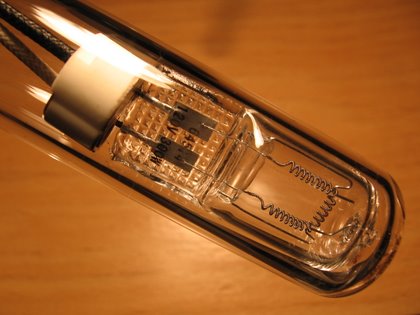
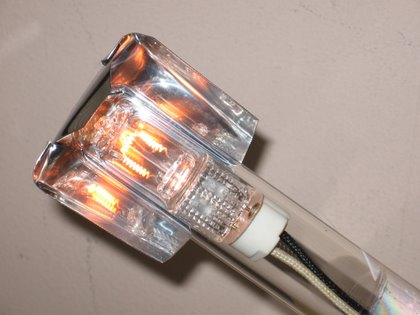
Far more suited to my purposes than the 60 watt halogen used in previous testing, is this beastly beacon:
At 300 watts, this sucker packs a punch (vendor link: lamp, socket). To protect it, I slid the lamp inside a thick-walled 1" OD, .75" ID test tube. Just for fun I lit it off and poked it inside the small mug. Three minutes later I withdrew the lamp and turned if off. Using an IR gun, I measured the temperatures inside the mug (exceeding 700 degrees) and the tube itself (exceeding 1000 degrees). I should think I can roast 8 ounces of coffee with that in a reasonable period of time. [note: my IR gun isn't rated past 500-some degrees, so really I have no idea what those high readings mean -- but I'll say this: for the first time ever, the outside of that little mug was uncomfortably warm. That interior steel was radiating.]
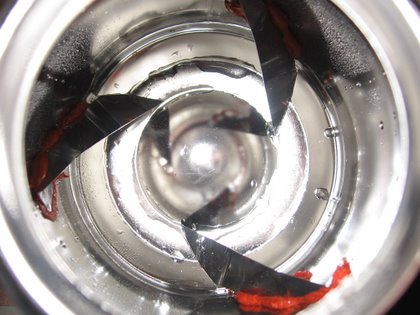
More challenging was mounting agitation vanes in the vacuum carafe. I used a high temperature RTV silicone compound to adhere stainless steel vanes to the interior sidewalls of the carafe. The moisture you see in the image was introduced to speed curing. I won't roast in it for at least a few days, to ensure maximum adhesion. This environment will definitely stress the silicone.
I just eyeballed the symmetry. This was tough, and made me realize what dentists and oral surgeons go through. I considered having my young daughter do the tricky stuff -- but that's crazy. If this roaster can do 8+ oz. in a way that allows for profiling, I'd sure like to scale it up to where I could reach into something to do this. Hemostats and lame ambient light are just no fun.
The vendor for the silicone is Polygem, and Jay Schmid welcomes calls at 630.231.5600. Ask for this stuff. Although I haven't vetted it over a period of 100 hours' roasting, it survived the first roast in top form (see below).
My ambition is to eventually control the roast with a software PID. For now, I just want to get the ball-park power requirements down. Scaling up from this, it'll make more sense to have many bulbs, and switch them on or off rather than throttle a single powerful lamp.
Wow.
Good grief, what fun.
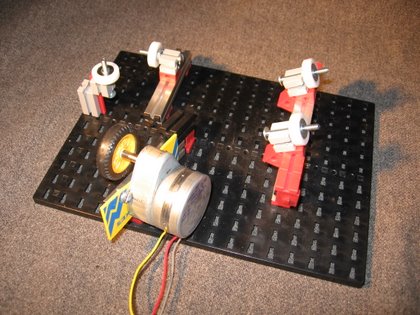
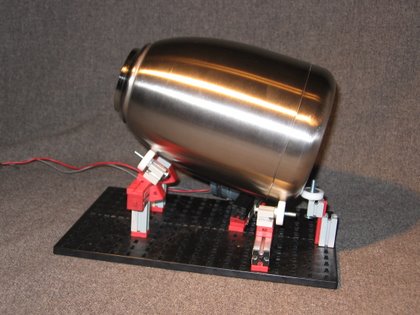
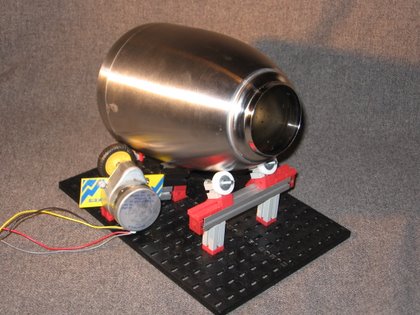
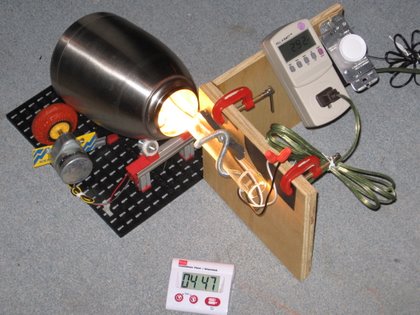
I stuck with Fischertechnik for construction. Too easy to pass up. I simplified it and adapted two alien parts: some nylon wheels and a 60 RPM motor, all from American Science and Surplus (one of their stores is not far from my job):
The carafe just sits atop the nylon wheels. The outside of the flask remains entirely cool to the touch, so a person could use just about anything. Heck, you could use beeswax and it wouldn't melt.
The front of the vacuum pot is elevated so the beans won't fall out. It's not so much a problem when the flask is just charged, but as the beans expand it could become an issue. Based on my first roast, though, I could probably do 10+ ounces in this thing with no problem. Below, you can see where the motor drives the flask's rotation. The drive ratio yields 18 RPM; I'd like it faster.
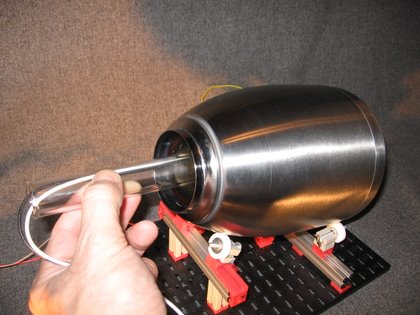
Alas, I didn't have a decent mount for the test tube. I just held it (it's an unusually long test tube, by the way). It only got slightly warm, so this was no problem. I had no idea what the optimal position for the lamp in the flask should have been, but common sense seemed to work. I avoided contact with the beans and kept the bulb toward the back end of the flask.
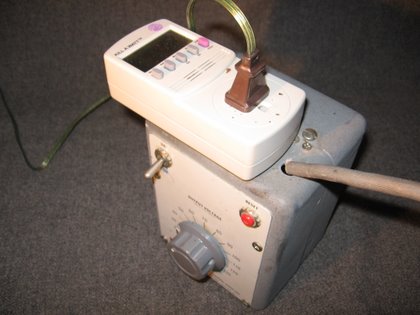
I used my lightweight Variac (model W5MT3) to throttle the halogen, and used a Kill A Watt unit to help me nail 250 watts even (50 watts below the lamp's rating). Don't ask me why -- just a hunch.
Here's how things went. Readings were with my cheap Cen-Tech IR gun:
-
0:00 / 70
-
5:00 / 227
-
10:00 / 323
-
13:36 / 390 (first crack begins)
-
16:00 / 443
I'd never experienced this before, though I'd seen it in a commercial drum: first crack and second crack as one. I was rolling in second before I realized what was happening, but I pulled the lamp and dropped 'em into the cooler before they went further than I'd have wished. By the way, I'm still amused that I can just grab this thing with my bare hands and it's entirely room temperature on the outside.
As it turns out, I nailed 8 ounces with 250 watts in 16 minutes. Thats only slightly over my objective of 1 watt per gram of coffee (8 oz. = 227 g.). Awesome. And in the time I'd have hand-picked for that to happen. Too, too cool.
I'll be wanting to speed up the early stages and slow down the later, though.
I'm not happy that I'm burning chaff amongst the beans. I'll be implementing a small blower (I already have it) to get rid of as much of that as possible (cycle it on briefly every now and then). A more aggressive agitation would help with that, but I'll save that for the scaled up version that comes next.
I like my new cooler -- a LOT quieter than the vacuum I was using.
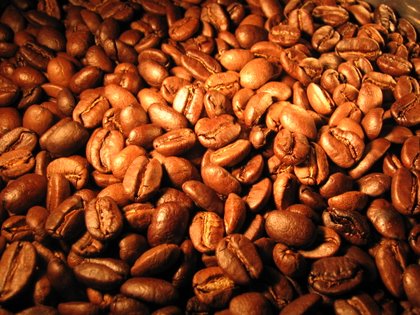
OK, here it is -- roasting porn. This hasn't had any processing on it -- just a straight photo. It was lit, appropriately enough, by halogen. :-) Want your breath taken away? Click the picture. :-)
I picked a nondescript Colombian for this roast, something I've found decent after a 5-day rest but nothing I'd give to friends. I couldn't resist cupping it after this roast, and darned if it wasn't pretty good almost right out of the roaster. Better than my poppered batches of it, I think. I could pick out some hints of that chaff, doggonit. Still, if I resolve that issue and it rests well, this bean will join my list of staples for giveaways.
Updates
4/26/06 - added a support to hold the test tube. That really helps, and allows me freedom to shoot temps with the IR gun, tweak the Variac, jot down notes -- even record the pops of first and second crack with a good microphone for FFT analysis. ;-)
4/27/06 - used the vacuum I used to use for cooling, for blowing chaff out of the chamber during roast. I didn't do this constantly, since that would steal a lot of heat. Just periodic blasts of air from the presssure side of the vacuum to keep the toasting chamber free of oxidizing chaff -- my one bane with this system. The key will be more aggressive agitation. More aggressive agitation also means I can't overload the system with beans, so the 10 oz. roasts I figured I'd try might be impractical once I've sped up rotation.
4/29/06
Nailed it. Well, nailed four perfect roasts in the thing, and then one tipped and very scorched one. This merits more than a brief note.
I'll get to the perfect roasts in a minute. Let's talk about the toasty roasty I did last of all.
I figured I'd try 10 oz, and reasoned that I might as well keep it at 300 watts for the full duration. Bad call! Based on the results, I'm convinced that the steel sides of the container are absorbing enough IR at full power to get much hotter than the beans, turning the drum into more of a conductive roaster than a radiant one. This could in part be due to oil/dust building up on the sides of the drum, resulting in less reflection and more absorption. This can lead to a thermal runaway, and in this case it was clearly out of hand. The lamp experiment with the empty mug proved the hazard of the steel getting hot, so I've now seen that hazard play out for real.
Keeping the drum clean seems important, but more effective, IMO, will be shielding from the halogen lamp that portion of the flask not covered with beans during agitation. I'll be trying this in my very next roast, simply by adding a piece of stainless steel outside the test tube covering from about 11 o-clock to 4 o-clock (the rotation has the beans occupying the remaining area). I have a feeling I'll get a double benefit. If IR absorbtion by the sidewalls has been more pronounced than I've suspected, shielding the lamp will reduce that and increase the IR falling directly on the agitating beans. This will reduce the amount of conductive heat transfer I seem to have been unaware of (and don't want) AND will increase the amount of IR hitting the beans.
The roaster can easily do 10 oz. In fact, I'm pretty cocky about trying 12 -- technically, this 10 oz. roast "worked," but suffered from overheated steel wiping out the beans (actually, less than an ounce of beans were tipped or scorched).
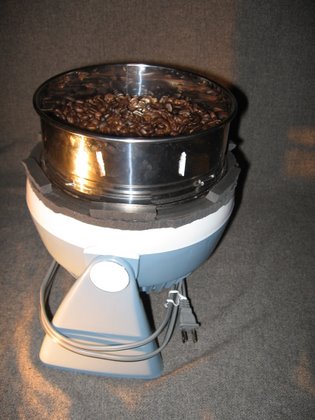
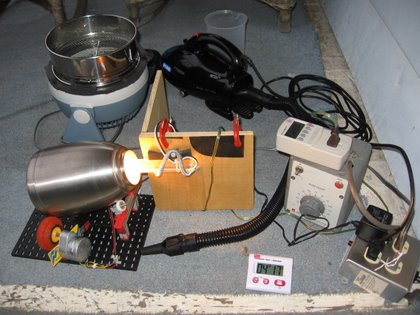
But enough about bad roasts. Here are some pictures of the setup as it is now. One thing I changed that definitely helps -- increasing the rotation to 26 RPM. Awesome. The vanes are now doing exactly what I hoped they'd do. I have three-dimensional circulation that's more effective than it was when I was at 18 RPM. I could go faster still, but I'm not sure it would be more effective. Maximal and optimal are not always identical.
In answer to an obvious question, yes I'll be replacing the Variac with a dimmer. I just happen to have the Variac on hand 'cause I was using it with the popper, so hey.
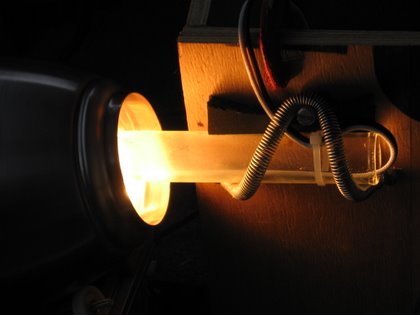
Here's the "glory hole" -- or so it appears:
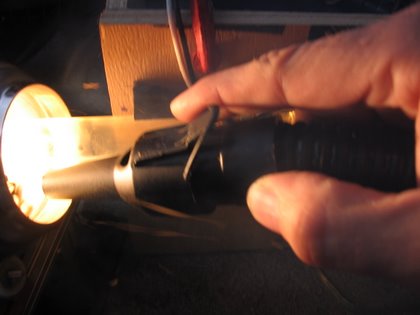
Blowing the chaff out with short occasional bursts of exhaust from a feisty vacuum cleaner is safe -- the beans don't lose enough heat to worry about:
BTW, there's a method to the madness of that spring holding the test tube on. I'm going to rig a hot-swap spare (literally ;-) in case of lamp burnout. The spring mount will make swapping out a lamp a moment's work.
Here's the accumulated wisdom to date. You can take this to the bank for this method, folks. Aside from the later lesson about shielding, the other points are what made the other four roasts perfect today. I order these with design considerations first, then operational concerns.
1. Shield exposed internal flask sidewalls from halogen, directing all energy toward bean mass
2. Ensure aggressive agitation of beans
3. Keep flask interior clean, free of dust and oils
4. Reduce power after first crack begins, to ensure separation of first and second crack
5. Periodically blast chaff out of the beans
That's it so far.
4/30/06
One more substantial change, and a successful (if long) 10 oz. roast. I added a reflector to the lamp to help keep the exposed sides of the flask cool. The steel gets red-hot in one spot; blackened from that, I suppose it's not going to be the most efficient reflector. :-\
But the 10 oz. roast came out well, despite taking 20 minutes to start second crack (which was all I was waiting for -- the first few snaps). With the shield on the lamp, I'm suspecting that without the additional conductive heating from the flask interior wall, the beans are taking longer to heat from IR alone. Instead of the wall contributing to their heat, they're heating the wall. This was borne out when I shot the temps of the wall just after the roast -- the steel was much cooler than the beans.
So this is bringing me back to longer roasts, meaning that 8 oz. might be the sweet spot after all for this thing. On the other hand, it was mostly the the ramp to first crack that was slow. Getting 'em out of the green is the time-consuming piece. I wonder what I can do to shorten that for more beans, shy of adding more heat?
Here's a video of the process (2.5 M .mov) that shows how bright it is (before the automatic exposure on the camera kicked in, finally), shows a bit of the beans agitating, and shows the simple chaff-blaster.
5/3/06
One last photo before some bad news [late edit: then some kind of better news, geez]. Here's an action shot after I replaced the Variac with a 600 watt dimmer:
Now for the bad news.
I'm retiring the project as a failure.
Thus far, I've roasted very consistent wet-processed greens. Tonight I roasted some decaf that raised an eyebrow, then a Harrar that confirmed the problem.
Homogenous greens roast fine. But the moment a somewhat heterogenous batch (e.g., dry processed) is roasted, the beans that darken first get into a positive feedback loop with the radiant energy, absorbing more of it than their slow-to-catch-up lighter cousins and therefore outpacing them even further, driven into darkness (apologies to Marlon Brando). Some beans finish first crack just as others are on the cusp of second. Geez.
Other roasting systems don't suffer this problem, because they present all beans, regardless of how far along they are in the roast, with an equal environment temperature.
Conventional drums and fluid bed roasters level out the bean differences over time. This system, alas, exaggerates the differences.
If anyone has any ideas about how to tweak this kind of system to avoid this problem, I'm all ears. But I'm skeptical. This is a real system-breaker! Some kind of radiation that's entirely agnostic to the bean darkness would do the trick, but that ain't infrared.
Dang!
Late edit: OK, now the kind-of-better news. As it turns out, I roasted a Harrar last night that turned out to be self-melanged all over the roasting map -- dark, light, and everything in between. That's what one'd expect from a dry processed anyway, but in keeping with my observations above and their reduction to theory, this effect seemed exaggerated. I retained the roasts, though, after picking out a couple dozen very light beans. This morning, after nary a rest (the beans) I brewed 'em -- and it was some really, really good Harrar. In fact, I can't remember the last time these beans tasted that good.
:-\
About the time I think I've found clear evidence of a certain truth, along comes an absurdity to challenge my conclusions.
So the kind-of-better news is that I won't retire this thing completely. I'll be using it for homogenous greens -- which means risking my best wet-processed. I'll do some other experimental stuff. Mostly I need to get a TC -- I'm lost without in-mass temperature readings!
Not over yet. If there's more to say, I'll add it here.
